
Apple’s Family Sharing is a powerful feature that allows you and up to five family members to share Apple services, purchases, and even locations—all without sharing passwords or merging accounts into one. This guide provides a step‑by‑step walkthrough to set up Family Sharing on your iPhone, manage shared features, and troubleshoot common issues.
Whether you’re a parent looking to set up parental controls or simply want to share iCloud storage and Apple Music with your household, this article covers everything you need to know.
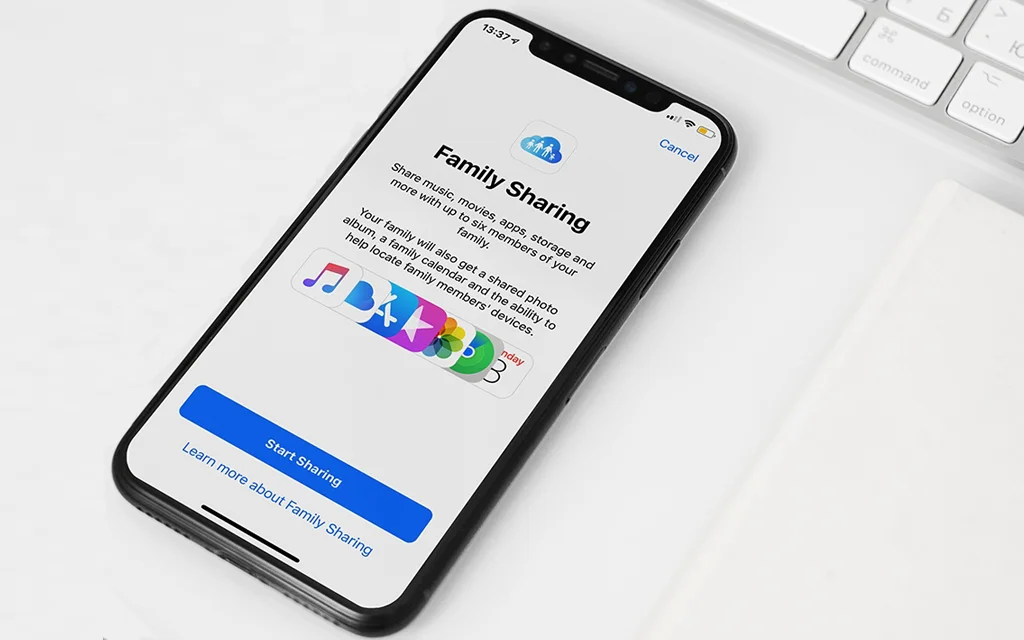
What Is Apple Family Sharing?
Family Sharing is Apple’s built‑in solution for connecting family members’ Apple accounts. Once set up, your family can share eligible purchases from the App Store, iTunes, and Apple Books; Apple subscriptions such as Apple Music, Apple TV+, Apple Arcade, and iCloud+ storage; and features like a shared family calendar, reminders, and photo albums.
Importantly, each family member keeps their own private account, so personal photos, documents, and messages remain confidential.
Before You Begin: Prerequisites
Before you start, ensure the following:
- You are the family organizer – The person who sets up Family Sharing must be an adult (18+ or the age of majority in your region) with a valid Apple ID.
- A valid payment method – The organizer’s Apple ID must have a credit or debit card on file. This card will be used for any shared purchases if Purchase Sharing is enabled.
- All devices are updated – Make sure your iPhone is running iOS 15 or later (preferably the latest iOS version) and that any family members you invite are also using supported devices.
- Family members have their own Apple IDs – Adults and teens should already have an Apple ID. Children under 13 (age may vary by country) can have an Apple ID created for them during the setup process.
How to Set Up Family Sharing on iPhone (Step by Step)
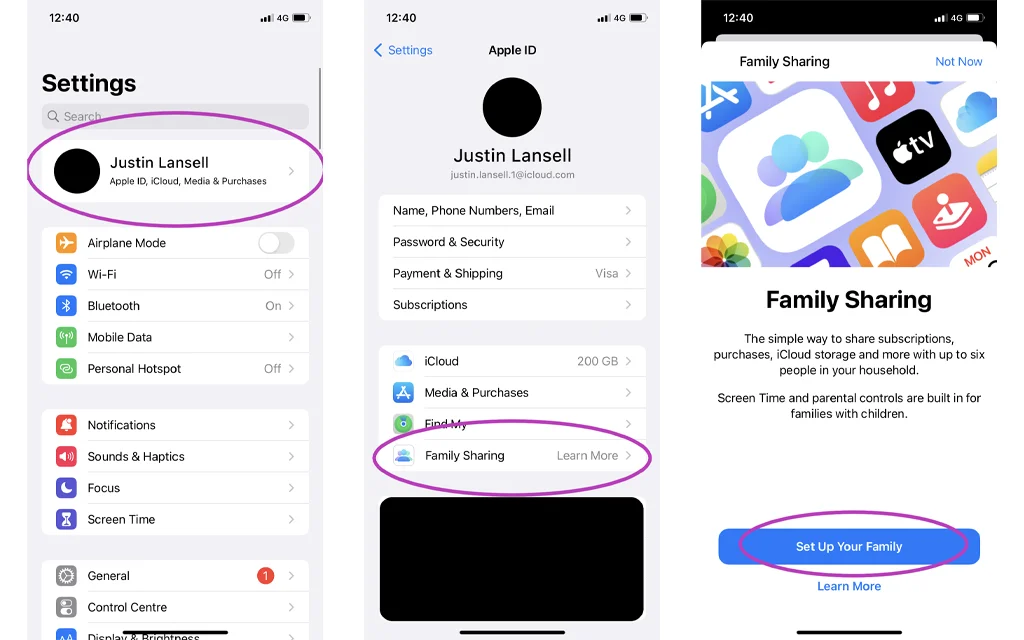
- Open Settings – Tap the grey Settings icon on your iPhone’s home screen.
- Tap your name – At the very top of the Settings menu, tap the section displaying your name and Apple ID picture.
- Tap “Family” – Depending on your iOS version, you may see Family Sharing or simply Family. Tap it.
- Tap “Set Up Your Family” – If this is your first time, you will see a button that says Set Up Your Family. Tap it.
- Follow the on‑screen instructions – Apple will guide you through confirming your payment method, selecting which features to share (purchases, iCloud storage, location, etc.), and choosing how to invite family members.
- Invite members – You can invite people immediately or do it later. To invite later, simply tap Done after the initial setup.
Note: If you have multiple Apple IDs, you can invite your own secondary accounts into the family group to share purchases made with those accounts as well.
Inviting Family Members
After the initial setup, you can invite additional family members at any time.
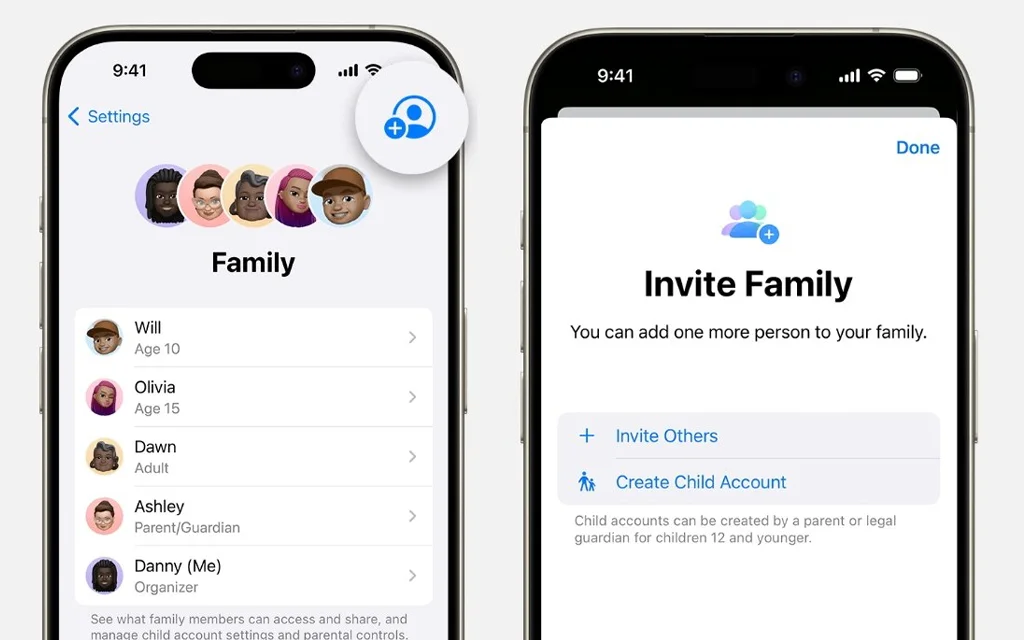
Inviting an Adult or Teen (Existing Apple ID)
- Go to Settings > Your Name > Family.
- Tap the Add Member button (a person with a plus sign).
- Choose Invite People.
- Select how to send the invitation: via Messages, Mail, or AirDrop (if the person is nearby). You can also let them enter their Apple ID password directly on your device.
- The recipient will receive the invitation. Once they accept, they will appear in your family list.
Creating a Child Account (Under 13)
If your child does not yet have an Apple ID, you can create one directly from the Family Sharing menu:
- Follow steps 1–2 above.
- Tap Add Member and then select Create a Child Account.
- Enter the child’s name and birth date. (Apple uses the birth date to set default content restrictions.)
- Follow the prompts to set up the new Apple ID and configure parental controls, including Ask to Buy and Screen Time.
- You may be asked to verify your identity (e.g., by entering the CVV of your credit card) to confirm you are an adult.
Managing Purchase Sharing and iCloud Storage
Once your family is set up, you can control what is shared.
Purchase Sharing
Purchase Sharing allows all family members to access each other’s eligible apps, music, movies, and books without repurchasing them.
- To enable or disable Purchase Sharing: Go to Settings > Your Name > Family > Purchase Sharing. Toggle Share Purchases with Family on or off. If enabled, the organizer’s payment method will be used for all future purchases made by family members.
- Ask to Buy – For child accounts, turn on Ask to Buy so that any purchase or free download requires the organizer’s (or a parent/guardian’s) approval. You will receive a notification and can approve or decline the request right from your device.
Sharing iCloud+ Storage
To share an iCloud+ storage plan (200 GB, 2 TB, etc.):
- Go to Settings > Your Name > Family > iCloud+.
- Tap Share with Family.
- If your current plan is not eligible for sharing (e.g., the free 5 GB plan or 50 GB plan), you will be prompted to upgrade. A 200 GB plan starts at $2.99 per month.
- Once enabled, all family members automatically draw from the shared storage pool. Their personal photos, files, and backups remain private unless they manually choose to share them.
Parental Controls: Screen Time and Ask to Buy
One of the greatest benefits of Family Sharing is the ability to manage your children’s device usage remotely.
Setting Up Screen Time for a Child
- Go to Settings > Screen Time.
- Under Family, tap your child’s name.
- Tap Turn On Screen Time (if not already enabled).
- Set Downtime (a schedule away from the screen), App Limits, and Content & Privacy Restrictions.
- Create a Screen Time passcode that only you know, so your child cannot change the settings.
- You can manage all of these settings from your own device; the restrictions will sync to your child’s iPhone, iPad, and even Mac.
Using Ask to Buy
When Ask to Buy is turned on for a child, any attempt to make a purchase (including free apps) sends a request to the organizer or another designated parent/guardian. You can approve or decline the request with a single tap, and you can even approve requests remotely when you are not near the child’s device.
Location Sharing with Find My
Family Sharing integrates seamlessly with the Find My app, allowing family members to share their locations with one another.
- To turn on location sharing: Go to Settings > Your Name > Family > Location Sharing. Tap the name of each family member you want to share your location with.
- Once enabled, all family members can see each other’s locations in the Find My app. This is especially useful for keeping track of children or helping a family member find a lost device.
- Each person can stop sharing their location at any time from the Find My app by tapping Me > Stop Sharing My Location.
Advanced Tips: Roles, Permissions, and Leaving a Family Group
- Roles – The family organizer is the person who sets up the group. Only the organizer can add or remove members, manage payment methods, and turn shared features on or off. The organizer can also designate other adults as parents/guardians, giving them permission to approve Ask to Buy requests and manage Screen Time for children.
- Leaving or disbanding a group – Any adult member can leave the family group at any time by going to Settings > Your Name > Family and tapping Leave Family. The organizer can remove any member from the same screen. If the organizer wants to disband the entire group, they must remove all members first. Note that an Apple ID can only belong to one Family Sharing group at a time, and an adult can only switch to a different family group once per year.
Troubleshooting Common Family Sharing Issues
Even with careful setup, you might encounter occasional problems. Here are solutions to the most frequent issues.
Family Information Not Available or Greyed Out Options
- Check your internet connection – Turn Wi‑Fi off and on, or switch to cellular data. Disable any active VPN.
- Verify Family Sharing is enabled – Go to Settings > Your Name > Family. If you see a “Set Up Your Family” button, Family Sharing is not yet configured.
- Sign out and back into Media & Purchases – Go to Settings > Your Name > Media & Purchases > Sign Out. Then sign back in with the Apple ID that is part of the family group.
- Check Screen Time restrictions – If Content & Privacy Restrictions are turned on, they may block access to Family Sharing settings. Temporarily disable them from Settings > Screen Time > Content & Privacy Restrictions.
Can’t See Shared Purchases or Subscriptions
- Confirm Purchase Sharing is enabled – Go to Settings > Your Name > Family > Purchase Sharing and make sure it is turned on.
- Check that all members are using the same Apple ID for purchases – In Settings > Your Name > Family > Purchases, ensure the Apple ID listed is the one used for Family Sharing. If not, tap Share using secondary Apple Account and sign in with the correct ID.
- The purchased item may not be shareable – Some subscriptions (e.g., individual Apple Music plans) and in‑app purchases from non‑participating apps cannot be shared through Family Sharing.
- A family member may have hidden the purchase – Ask them to go to the App Store > their profile picture > Purchased > My Purchases, then scroll to Hidden Purchases and unhide the item.
Member Cannot Join the Family Group
- The person is already part of another family group – An Apple ID can belong to only one Family Sharing group at a time. They must leave their current group before accepting your invitation.
- The invitation expired – Resend the invitation from Settings > Your Name > Family > tap the person’s name > Resend Invitation.
- Incompatible device or software – Ensure the person’s iPhone, iPad, or Mac is running a supported version (iOS 9 or later for iPhone/iPad, OS X El Capitan 10.11 or later for Mac). If they are using an older device, they will not be able to join.
Final Tips for Getting the Most Out of Family Sharing
- Always keep all devices on the latest version of iOS for the best Family Sharing compatibility and security.
- Use Screen Time combined with Family Sharing to set healthy digital boundaries for children without needing to physically check their device.
- If you share an iCloud+ plan, choose the 2 TB or larger plan to ensure sufficient storage for multiple family members’ backups and photos.
- Assign a second parent or guardian in the group so that one person does not become the sole point of contact for approvals and requests.
- Review shared subscriptions periodically via Settings → Family → Subscriptions to avoid paying for services no one in the group uses anymore.
Final Thoughts
Apple Family Sharing is an invaluable tool for households with multiple Apple devices. It saves money by letting everyone share purchases and subscriptions, keeps family members connected through location sharing and shared calendars, and gives parents peace of mind with robust parental controls like Screen Time and Ask to Buy.
By following this guide, you can set up Family Sharing on your iPhone in just a few minutes and start enjoying a more connected, cost‑effective digital family life.
2 thoughts on “How to Set Up Family Sharing on iPhone: A Complete Step-by-Step Guide (2026)”